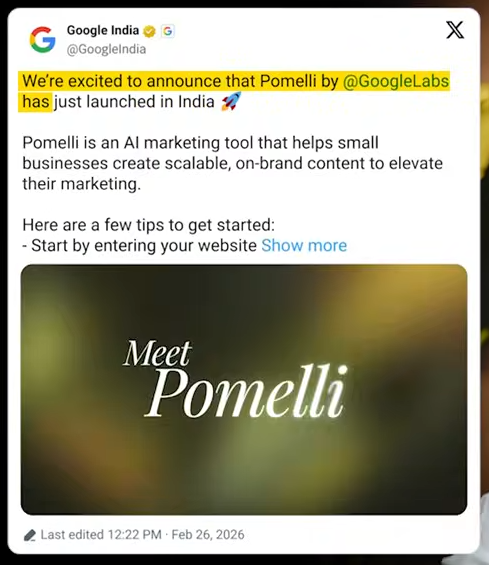
Google has officially made Pomelli available in India and Pakistan and more other countries . Now this tool allows you to take your website and extract brand colors also get some ideas on your artwork and it has a bunch of small small features that can help you as a beginner graphic designer to accelerate your workflow. But instead of me there’s going to be one more designer from our team to show you how Pomellle works. So DSA the stage is yours. Pome is a marketing assistant launched by Google labs with help of Google Deepmind. It is positioned as really useful for small to mediumsiz business owners. Put it to real test and see how it works.
Getting Started & Extracting Your ‘Business DNA’
So to access Pom I’m just going to head to my browser and type Pomi Google apps and then I’ll click on this link called Pom by Google apps. Once I click on it I’ll be redirected to this page and here I’ll click on let’s get started. Once I click on let’s get started I’ll be redirected to the homepage of Pom. Here I can see what all it can do for me. It can generate business DNA. It can get me campaign ideas and also generate creatives.
Testing the Campaign Generator (Hits & Misses)
I’ll click on let’s go and we’ll be testing each of these features one by one. Now I’m prompted to enter my website. You can enter your own website but for now I’ll be taking an example of my favorite skincare brand called minimalist. I’ll just copy this and then I’ll just paste it here and then I’ll click on continue. Once I pasted my link it started generating my business DNA. The process may take up to 8 to 10 minutes currently is available on all Google plans. I am on the pre version. It is also giving me a glimpse of what is happening behind the scenes. It is saying picking up brand fonts pulling images from your website summarizing business. Okay it looks like it has extracted my business DNA. It has extracted the fonts of minimalist. It has extracted the logo colors brand values brand aesthetic brand tone of voice and even the business overview. Oh this looks pretty great. It has extracted all the images also. Oh including the testimonials one. Let me see what it can do with my business DNA.
I’ll click on looks good. Once I click on looks good I’ll be redirected to campaigns. Here I can either write my own prompt or I can even check out what it has suggested based on my business DNA. Let me check out this one. The 2% salicylic acid solution. This one looks good. So this one is okayish only. Uh as a designer I cannot ignore the alignment issue here. But yeah this one looks good. Let me see what else I can do here. I can change the header. I can change the color. I can also change the description. I can even add a call to action. Let’s hit on generate and see what it does. Okay it added a button. This looks fine. Let me see what else I can do. Can I change the image yes. Okay all these images are sourced from my website itself. I can even prompt the image. Let me use something from here itself. Let me use this model. Apply. Okay. Let me check out this campaign. This is also similar. Nothing very great. And then this one. Okay. This template looks a bit good. Okay Overall as you can see the designs are pretty average.
These cannot be used for a good marketing campaign but small business owners who are just starting out can use this on their social media to keep it active. Let me try prompting my own campaign. Let’s see. Create a campaign around Christmas. I’ll select the product. Okay I can add the product URL or I can select the images. Let me select one product image. I’m going to select this pink one. Looks good. Aspect ratio. I want it in the story size. Generate ideas. Let’s take a look at what it generates. Okay looks like it has generated few ideas. Let me check the first one. These don’t look great. The design is pretty average. Okay no secrets under the tree. Okay this is inside a lab but I don’t see anything related to Christmas here. Okay this is also pretty average. The designs are not that great. It could use a lot of improvement in my opinion. Even the product has been changed here. I selected the pink one. I think it can do better in the campaign section.
Secret Weapon of GoogleGemini
Exploring the AI Product Photoshoot Feature
Now let us explore the photo shoot feature.
I’ll head to photo shoot section. Select create product photo shoot and then I’ll upload my product image. All these images have been extracted from the website itself. I’ll select anyone. I want to go with the screen and I’ll select on looks good. And then I’ll select the aspect ratio. I want it to be square. And then I have a bunch of photo shoot template options. Okay so it categorized my product into beauty brand and automatically suggested few of the templates. Let me go for something else other than the recommended ones. I don’t want this one. I want one with the model. And then I like the one with the sink. And then I don’t want Easter theme. Yeah looks like I can select themes also. Let me do one for Halloween. Uh let’s click on looks good create photo shoot. One more interesting thing about Pomeia is that it did pretty good when I used some skincare related products but when I used products other than skincare let’s say for example protein brands or anything other than that uh I don’t think so it did as good as job.
Okay looks like it has generated something. This one was the original image I uploaded. Okay I can even edit it. Let me try something. Make it look like it is in the water. Let me try how this works. Meanwhile let me explore other images. Okay this one is good but the text has been blurred. Okay this one is also good. Okay I like this one too. Looks like it has generated. Okay this did a pretty good job here. Uh but I also asked it to generate a Halloween theme image but I don’t think so. It has taken that into note. But overall this looks okay. We can ask it to edit this image also. Let me try make her smile. I’ll just hit enter. Let’s see what it does. Okay. One more thing. If I click on the close button here I’ll be exited from the whole campaign itself. Whatever I’m generating. Instead you have to go back here and then see all the images. Okay. Looks like it did a pretty good job here. Did it change the model by any chance no. No. The model is the same.
Yeah it looks like it did get it right this time. So I can create campaign using these images also. I can add all to my business DNA and then download it. Otherwise I can just download all the images by just clicking here.
The Designer’s Verdict: Pros, Cons, and Workarounds
So overall for me is great at generating business DNA. The campaigns also look good. The photo shoot feature was also great. I really liked how it edited this particular image inside water and also it got the prompt right here. You can also download the images. You can also use this images again by adding it to your business DNA. So the tool is great for small business owners but it could use a lot of improvement in terms of design. As a designer myself I wouldn’t use this directly on my social media but I would take this as a baseline give it to Nano Banana Pro or Hickspiel and build on top of it. That’s it about Pomei. Over to
The Future of AI in Design & Final Thoughts
Now folks before I end this tutorial I want to remind everyone that Pomei is currently an experiment under Google Labs. With time they will only make this better.
We’ve already released Nano Banana 2 tutorial and you can see how these models are becoming better and better. There’s going to be a time when you will be able to create multiple iterations of an ad using something like Pomelli where you can just upload your brand assets upload your typography and then create assets at scale. The issue is that most design colleges most design agencies are just not taking these changes very seriously. AI is not very creative until unless there’s a smart human being using it. By mathematical algorithms AI takes inspiration from the average. So you as a creative individual are going to be responsible to take that certain outcome from an AI tool like Pomelli or from a free pig or from a Hicksfield and take it to the next level.
Google’s Nano Banana 2
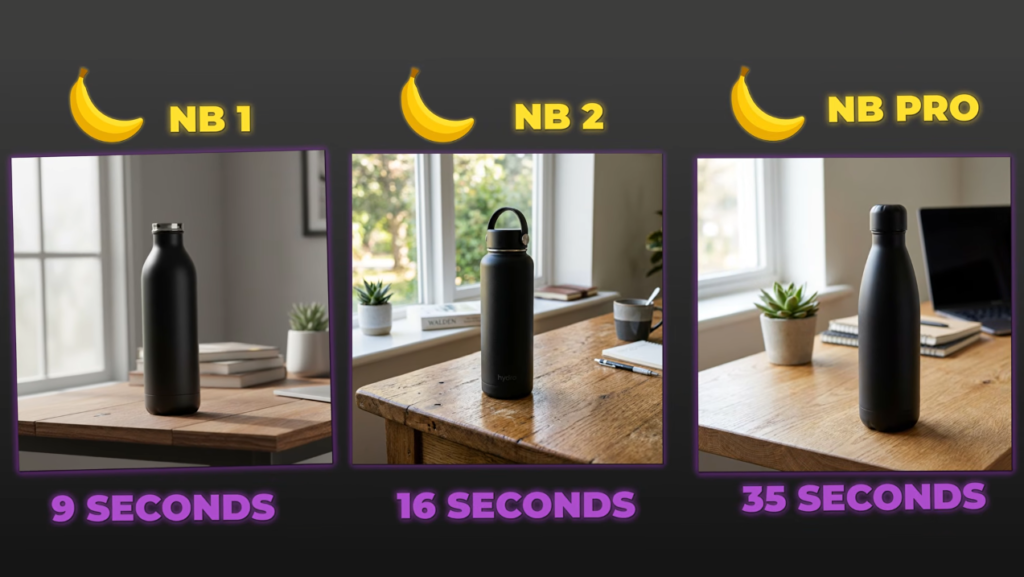
Google just released Nano Banana 2 That’s one Two Yay. Faster better quality. We’ve been waiting for it. Look at this Left side Nano Banana Sample Nano Banana 9 seconds done Center brand new Nano Banana 2 16 seconds Right side Nano Banana Pro 35 seconds. The simple one is fastest but the quality Pro is slowest but the quality is incredible. And this new one in the middle is the sweet spot most people have been waiting for. Here’s what’s happening. Google just added a third option to the lineup. You now have three models to choose from. Most people are using the wrong one. What they’re doing I’m going to test all three side by side Speed quality text rendering complex scenes. If you’re still using the simple fast model for everything you’re wasting time. And if you’re waiting for pro when you don’t need to you’re wasting even more time.
The Speed Demon, the Smart Middle, and the Pro Powerhouse
So let’s break it down. So what is Nano Banana 2 and why does it matter. Now each model has a specific use case. Here’s the lineup Nano Banana This is the original model It’s the fastest option by far. We’re talking 8 to 12 seconds per image but the quality is rough. Details are blurry. Text rendering is bad. Anatomy gets weird. This is the speed demon but you sacrifice a lot. It’s still available because some people need pure speed over everything else. Nano Banana 2 This is the new model Google just launched.

Officially called Gemini 3.1 Flash image. It’s the middle ground. You get way better quality than the simple model. We’re talking prolevel intelligence but you’re not waiting 40 seconds. It’s around 15 to 20 seconds per image. This is what most people should be using now. Nano Banana Pro This is the slowest model. It takes 30 to 40 seconds per image but the quality is unmatched. Ultra realistic textures perfect anatomy flawless text rendering. This is for professional work where you need maximum quality and you’re willing to wait for it. It’s only available on Gemini advanced plans so pro or ultra subscriptions. The big change here is that Nano Banana 2 exists at all. Before this you had to choose between fast and bad or slow and great. Now you have a middle option that’s fast enough for iteration and good enough for real use. Here’s how to access them gemini.google.com Click create image. By default you’re on the simple fast model if you’re on a free account but you can now see all three options in the dropdown. Pick Nano Banana 2 to use the new balanced model. AI studio Go to a studio.google.com Click the model selector Choose images. And you’ll see all three models listed Simple Nano Banana 2 and Pro. In my own platform AI master. Inside AI master we already have access to both the simple Nano Banana and Nano Banana Pro. Right now all generations are watermark free and go up to 4K. And here’s the good news. We’re adding Nano Banana 2 very very soon. So you’ll have all three models in one place without switching apps. If you’re on a paid Gemini advanced plan you can generate with any of the three models. If you’re on a free account you get access to the simple fast model and Nano Banana 2 but Pro is locked behind the paywall. One more thing Nano Banana 2 comes with style presets. When you open the image generator you’ll see preset styles like cyborg steampunk resap and more. You click one and it uses that as a visual reference. It’s basically a shortcut so you don’t have to write in the style of in every prompt. This is huge for speed. You can iterate through three different styles in under a minute. We’ll test those later with cyborg steampunk and rigor presets. So I’ve got three models open right now. I’m running the exact same prompts through all three to show you the real differences. We’re testing six things. Speed How fast can each model generate and edit images. Text rendering Can they handle complex typography and layouts. Photo realism Which one looks most realistic. Complex scenes Google says Nano Banana 2 can handle five characters and 14 objects. Let’s test that. Prompt adherence Do they follow weird contradictory instructions. And I’ll show you a brand new feature called style presets. And how useful are the new style templates in Nano Banana 2. And then I’ll give you a simple decision framework so you know which model to use for what.
The Real-World Test: We Compare Speed vs. Quality
Let’s start with speed. First test pure speed. Same prompt three models stopwatch running. Prompt a photorealistic matte black reusable water bottle on a wooden desk with natural window light. Sharp focus 4K quality. Here is results. Basic model 9 seconds Nano Banana 2 16 seconds Nano Banana Pro 35 seconds. So the simple model is almost twice as fast as Nano Banana 2 and nearly four times faster than Pro. That’s a massive speed difference. But let’s check the quality. The Simple Nano Banana looks rough. The lighting is flat. The details are blurry. You can kind of tell what it is but it doesn’t look professional at all. The wood texture is muddy. The bottle reflection is barely there. Nano Banana 2 looks way better. The lighting has depth. The wood grain is visible. The reflections on the bottle are clear. This looks like an actual product photo. You could use this in a blog post or a social media ad without anyone noticing its AI. Nano Banana Pro is pristine. The light reflections are perfect. The material texture is exactly like matte black metal. The wood has visible grain patterns. This looks like it came from a professional photographer. Quality gap Simple to Nano Banana 2 is a huge jump. Nano Banana 2 to Pro is a smaller jump. Both look good but Pro is slightly more polished. Now let’s test image editing speed. I’m uploading a base image and asking all three models to add a logo to the bottle. Prompt: Add this logo to the water bottle keeping the lighting and composition natural. Simple banana 11 seconds. Logo placement is offcenter and the lighting doesn’t match. Nano Banana 2 14 seconds. Perfect placement Lighting integrated naturally. Pro version 32 seconds. Perfect placement Best lighting integration. The simple model is fast but sloppy. Nano Banana 2 is fast and accurate. Pro is slow but flawless. Let’s do one more iteration. Prompt Change the light into dramatic nighttime with a desk lamp Keeping the bottle and logo No extra text. Simple Nano Banana 10 seconds. The lighting changes but it looks fake. The shadows are wrong. Nano Banana 2 15 seconds. dramatic lighting realistic shadows good depth. And Pro model 34 seconds. cinematic lighting perfect shadow gradation professional look. So simple Nano Banana wins on pure speed no question. But the quality is noticeably worse. Nano Banana 2 is the sweet spot fast enough for rapid iteration good enough for real use. Pro is the slowest but if you need maximum quality it’s worth the wait. So here’s something a lot of creators run into. You spend time learning a tool like Nano Banana 2 get genuinely good at it and then you still end up stuck when it comes to the visual side. Making your content actually look like it belongs on social media posters thumbnails branded graphics that stuff takes forever in traditional tools. And most AI image generators just spit something out and leave you to figure out the rest. Lavalart AI is different. It’s the first AI design agent that actually completes the work. Not just generates an image but delivers finished ready to post visual. You describe what you need and it builds it out. Layouts text elements the whole thing. And then this is the part I actually think is wild. You can edit individual pieces of it precisely. Click on any text element and rewrite it while keeping the original typography intact. Click on a background or object and swap it out. No Photoshop no back and forth prompting. Let me show you some real examples I just made. First my event poster. I just typed make a poster about my event AI Master Pro and in 30 seconds it generated a complete poster with text layout everything. And here’s the part that’s wild. Touch edit. I cmd click any part of the image type what I want to change hit generate. Second packaging mockup coffee brand full presentation bag design label display visual generated in one go using the packaging scale. I wanted to change the tagline text but keep the exact typography style. So I used text edit clicked the text rewrote it to bold mornings start here and it kept the same font texture and style. Just swap the words. Same design different message. Zero time wasted remaking it. Third Instagram post for a fashion brand. I uploaded a pattern design. Selected fashion and pattern design skill and Love Art applied it across five different garment mockups T-shirt hoodie tote bag sneakers cap. This is the efficiency part. Instead of creating five separate designs manually I got the whole set in under 2 minutes. Professional consistent ready to post. Fourth add a creative AB testing. Same campaign three completely different visual styles. I used the marketing creative testing skill entered the core message and Love Art generated minimalist bold and vintage versions side by side. You can literally test which style performs better before committing to production. Over 10 million professionals are already using it across design branding content and e-commerce. And right now they’re offering up to 50% off. That includes 7 days unlimited on Seedream 5.0 plus 365 days with zero credits on Nano Banana Pro Midjourney V7 Clang and more. So check it out at lavart.ai link below. All right back to the tips.
Can AI Write Now? Complex Text Rendering Put to the Test
Text rendering is where AI image models usually fail. So let’s see how each model handles complex text. I’m giving all three models a detailed prompt with exact text specifications. Pricing page for a product called AI Master Studio. Prompt: Design a photo realistic laptop on a desk with a browser window showing a pricing page for AI Master Studio. And I just dropped this text rendering requirements. Let me zoom in on each one. Simple nano banana headline Okay AI Master Studio pricing in subhead. Some words misspelled missing letters grammar broken. And here is where chaos starting. Table Some numbers are random. Column headers are gibberish fine print completely unreadable random letters. This is unusable. If you need text in your image the simple fast model is just a basic option. Next Nano Banana 2 Headline AI Master Studio pricing Perfect. Subhead: Choose a plan that fits your workflow Exact match table. All three columns correct. All values match exactly. Fine print Prices in USD Taxes may apply Terms and conditions apply Perfect. This is completely accurate. You could use this in a real presentation. Pro version Font rendering is slightly cleaner. Pro is marginally better in font clarity. The kerning and anti-aliasing are a bit smoother but Nano Banana 2 got every word right. Text rendering verdict Simple Nano Banana fails completely add text. Nano Banana 2 is fully accurate. You can use it for infographics presentations pricing tables. Pro is slightly cleaner in font rendering but Nano Banana 2 is good enough for 95% of use cases. If you need text blocks in your images don’t use the old model. Use Nano Banana 2 or Pro
Professional Claude SkillsBeyond Plastic: Pushing the Limits of Photorealism
Now let’s test photo realism. Can Nano Banana 2 match pros quality on hyperrealistic images. My prompt here Close a portrait of a 35year-old man with natural skin texture stubble fine lines wearing a denim shirt soft window light from the left shallow depth of field Canon 5D Mark IV 85 mm f1.8 editorial photography style. Simple nano banana. The skin looks flat and smooth like plastic. The stubble is just a gray blur. The lighting has no dimension. This is clearly AI generated. You can tell immediately. The denim shirt has no texture. It’s like a blurry painting. New Nano Banana 2 is much much better. The skin texture is realistic. You can see pores and fine lines. The stubble has individual hairs. The lighting has depth and shadow gradation. The denim shirt has visible weave texture. This could pass as a real photo at first glance. And the pro model is the winner. The skin texture is photographic. Individual pores realistic freckles natural color variation. The stubble has perfect detail. The denim weave is crisp. If you didn’t know this was AI you’d think it’s a professional portrait. So simple Nano Banana looks fake. Nano Banana 2 is a huge leap in realism. Good enough for social media blogs marketing. Pro is the best. It genuinely looks like a photograph. Use Pro for professional client work or editorial photography. Use Nano Banana 2 for everything else. The gap between Simple and Nano Banana 2 is massive. The gap between Nano Banana 2 and Pro is smaller. That’s the big story. Nano Banana 2 gets you 90% of Pro’s quality at half the wait time.
Characters, Objects, and Contradictions: Testing Complex Scene Intelligence
Google says Nano Banana 2 can handle up to five characters and 14 objects in a single scene. Let’s actually test that claim. I use this prompt That’s five people plus 14 specific objects. Let’s see who gets it right. Alt nano banana model people I count three people not five. Guitar player is there. Marshmallow person is there but the photographer reader and stargazer are missing. objects I see one backpack missing two. One tent missing one. Lanterns are blurry blobs. Water bottles maybe two objects are either missing or unrecognizable. Anatomy The guitar player’s hands have seven fingers. The faces are blurry and inconsistent. This is unusable for complex scenes. Next Nano Banana 2 People all five are there. Guitar player marshmallow roaster photographer reader with flashlight stargazer. objects three backpacks two tents two lanterns four water bottles color map compass binoculars. anatomy hands look natural faces are consistent proportions are correct. Nano Banana 2 nailed the prompt completely. and pro Everything’s there and the composition is more cinematic better use of space. Fire light illuminates faces more realistically. Anatomy flawless best hand rendering most natural poses best facial detail. complex scene verdict simple Nano Banana can’t handle complexity at all. Nano Banana 2 followed every single instruction. All five people all 14 objects correct anatomy. Pro has better composition and lighting but Nano Banana 2 executed the prompt perfectly. If you’re doing concept art storyboarding or complex illustrations Nano Banana 2 is now a real option. Don’t waste time with a simple fast model for this stuff. This test is about instruction following. Can the models handle weird contradictory prompts. My prompt here a glass bottle filled with ocean water but the ocean inside the bottle is stormy with lightning While the ocean outside the bottle visible beach background is calm and sunny bottle half buried in sand photorealistic sharp focus golden hour lighting. intentionally contradictory stormy inside calm outside. look at basic nano banana model result. The bottle has blue water but there’s no storm. The background is maybe a beach. The lighting is inconsistent. It ignored half the prompt and just made a generic bottle and sand. Now Nano Banana 2. There’s a bottle with churning stormy water inside. You can see miniature lightning bolts. The beach in the background is calm and sunny. The contrast is clear. It understood the contradictory concept and executed it. And pro version same concept better execution. The storm inside the bottle is more dramatic. The glass refraction is realistic. The light and transition from stormy inside to golden hour outside is seamless and natural. Prompt adherence verdict Simple Nano Banana ignores complex instructions. Nano Banana 2 has strong instruction following. It handles contradictory concepts well. Pro is the best at nuanced execution but Nano Banana 2 is close. If you want to actually practice everything I just showed you and learn how to use these models professionally this is where AI master comes in. Inside AI Master get access to all these image models in one place. Nano Banana 1 2 Pro GPT image 1.5 all of them. But AI Master isn’t just another image generator. It’s where you learn how to think with AI first then practice immediately with real tools. Let me show you. I’ll open AMSer Studio inside AMSRE. All generations are watermark free up to 4K output and you can switch between them instantly to compare results exactly like we just did in this video. But the real power is in the learning site. If you get stuck AI master chat is right there. It’s an AI tutor trained on the entire platform. Ask it how do I improve text accuracy in the nano banana model and it will give you specific prompt techniques. The goal is simple. Don’t just generate images. Understand how to prompt for what you need. Compare models intelligently and build a workflow that works for your project. That’s what AMS teaches. Right now there is 30% off the annual link below. You should go check it out.
Shortcuts for Creators: Nano Banana 2’s Style Presets
Let’s talk about style presets. This feature is only Nano Banana 2 and it’s one of the best additions. When you open the image generator with Nano Banana 2 you see a row of preset styles Gothic clay cyborg cinematic old cartoon and more. You click one and it uses that style as a visual reference. Instead of writing in the style of in your prompt you just click and go. Let me demo this. Same prompt three different presets. My prompt here a futuristic classroom where an AI master teacher is instructing students. Let’s pick a cyborg preset. Done in 15 seconds. This gives you that metallic high-tech aesthetic. Chrome surfaces glowing circuits robotic elements. Perfect for sci-fi content or futuristic branding. Next steampunk 16 seconds. Now it’s Victorian era meets industrial. brass gears vintage machinery warm copper tones. Great for alternative history projects or retro futuristic designs. 14 seconds. This gives you that retro print look. grainy texture limited color palette vintage poster vibes. Perfect for indie projects zenes or nostalgic marketing materials. Same prompt three completely different results all in under 20 seconds. If you’re iterating fast or you know the style you want presets save massive time. This feature isn’t in the simple fast model or pro it’s exclusive to Nano Banana 2 which makes it even more useful as your daily driver.
The Final Verdict: Your Decision Framework for Every Design Project
All right let’s make this simple. Here’s exactly when to use each model. Pick a simple nano banana for quick mock-ups where quality doesn’t matter. Placeholders and drafts. Testing prompt ideas before final generation when you need 50 images in 10 minutes. Basically only use this when speed is the only thing that matters and quality is irrelevant. Use Nano Banana 2 for social media content. Instagram Facebook LinkedIn blog headers and article images. infographics and presentations with text. Marketing visuals for emails ads landing pages quick prototypes that look good. Storyboarding and concept art mass content production with quality standards. Basically 85 to 90% of everyday use cases. It’s fast enough for iteration good enough for real use. and pro version 4 film master shots and cinematic frames. Professional client work magazines brands editorial. ultra realistic character renders for games or VFX. final deliverables where maximum quality matters. Large scale text rendering menus signage posters. Basically the last 10% where you need absolute perfection and you’re willing to wait 35 plus seconds per image. The simple fast model still has a place. If you need pure speed and quality doesn’t matter but for 90% of real world use you should be using Nano Banana 2 now. And Pro still the best for high-end professional work. But unless you’re doing editorial photography or client projects where perfection matters Nano Banana 2 is good enough. But the fact that Nano Banana 2 exists at all is a game changer. Before this you had to choose between fast and bad or slow and great. Now you have a metal option that’s fast enough and good enough for actual use. If you are a content creator marketer designer this is your new daily driver. If you want more AI tool breakdowns like this where I test everything side by side so you know what actually works hit subscribe. I do these every week. And if you want to learn how to use these models properly instead of just guessing at prompts check out AI Master link below 30% off the annual plan right now. All right that’s it. Thanks for watching. I’ll see you in the next.